
Hampton Bay Ceiling Fan Instruction Manual: A Comprehensive Guide
This manual provides essential guidance for installing‚ operating‚ and maintaining your Hampton Bay ceiling fan‚ ensuring optimal performance and longevity․
It covers identification‚ troubleshooting‚ and repair procedures‚ referencing popular models like the Huntington III from 2002 and 54-inch fans․
Understanding Hampton Bay Ceiling Fans
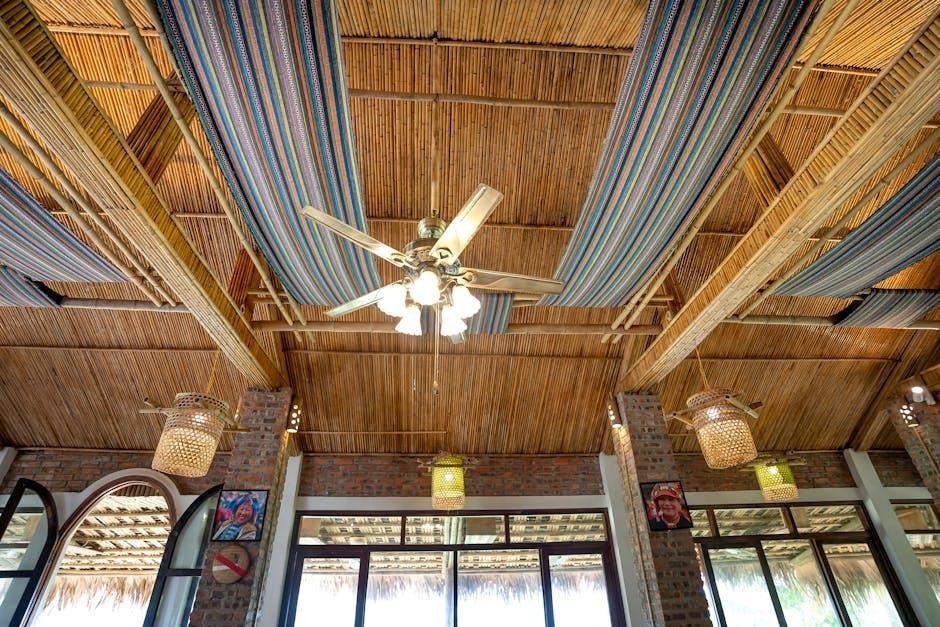
Hampton Bay ceiling fans are renowned for their blend of affordability‚ style‚ and functionality‚ becoming a staple in many homes․ These fans‚ often found in new constructions or as replacements‚ offer a diverse range of designs to complement various interior aesthetics․
Understanding the core components – the motor housing‚ blades‚ light kits‚ and remote controls – is crucial for effective operation and maintenance․ Many users‚ as seen in online forums like Reddit’s r/HomeImprovement‚ appreciate the powerful airflow provided by models like the Huntington 3 from 2002‚ even noting minor wobbles as a common characteristic․
Identifying the model number‚ typically located on a sticker atop the motor housing or via the UPC code‚ unlocks access to specific instructions and replacement parts․ Familiarizing yourself with these details empowers you to address issues efficiently‚ ensuring years of comfortable and reliable performance from your Hampton Bay fan․
Hampton Bay Fan History and Popular Models
Hampton Bay fans have a long-standing presence in the home improvement market‚ consistently delivering value and style․ While the brand itself is owned by Home Depot‚ the fans are manufactured by various companies‚ contributing to a diverse product line over the years․

The Huntington series‚ particularly the Huntington III (circa 2002)‚ remains a frequently discussed and appreciated model‚ as evidenced by discussions on platforms like Reddit․ Users often highlight its robust performance and classic design‚ even decades after installation․ Beyond the Huntington‚ 54-inch fans represent a popular size‚ offering substantial airflow for larger rooms․
Throughout the years‚ Hampton Bay has adapted to evolving design trends‚ offering fans with varying blade spans‚ finishes‚ and features; Understanding the history and recognizing popular models aids in identifying parts and finding relevant support resources when maintenance or repairs are needed․
Locating the Model Number
Identifying your Hampton Bay ceiling fan’s model number is crucial for accessing specific documentation‚ ordering replacement parts‚ and receiving accurate support․ The primary location for this information is typically a sticker affixed directly to the motor housing of the fan․ This sticker is often found on the top portion of the motor‚ requiring you to carefully look upwards into the fan’s center․
However‚ if a sticker is missing or illegible‚ an alternative method exists․ The Universal Product Code (UPC) located on the fan’s packaging or sometimes on the motor housing itself can be used․ Contacting Hampton Bay customer service and providing the UPC code will allow them to identify the model for you․
Accurate model identification streamlines the troubleshooting and repair process‚ ensuring you obtain the correct components and instructions for your specific fan․
Finding the Sticker on the Motor Housing
Locating the model number sticker on the motor housing is the most direct method of identification․ Begin by ensuring the ceiling fan is switched off at the breaker for safety․ Carefully inspect the top of the motor‚ the central component of the fan assembly․ The sticker is usually a small‚ rectangular label‚ often white or silver‚ displaying the model number and potentially other technical specifications․
You may need a step ladder to comfortably reach and view this area․ Use caution and ensure the ladder is stable before ascending․ The sticker might be partially obscured by wiring or other components‚ so a flashlight can be helpful for better visibility․
Take note of the complete model number as it appears on the sticker‚ as this is essential for accessing relevant support materials․
Using the UPC Code for Identification
If the model number sticker is missing or illegible‚ the Universal Product Code (UPC) can serve as an alternative identifier․ The UPC is a barcode typically found on the original packaging of the ceiling fan‚ or sometimes directly on the motor housing itself․ It’s a 12-digit number encoded in barcode format․
To utilize the UPC code‚ contact Hampton Bay customer service directly․ Provide them with the complete UPC code‚ and their representatives can cross-reference it with their database to determine the fan’s model number and associated specifications․
Be prepared to describe the fan’s features‚ such as blade span‚ finish (e․g․‚ white and brass)‚ and any included light kits‚ to aid in accurate identification․ This method is particularly useful for older fans where the original documentation is unavailable․
Decoding Hampton Bay Model Numbers

Hampton Bay model numbers‚ while seemingly arbitrary‚ often contain clues about the fan’s characteristics․ Understanding this system can help determine features even without extensive documentation․ While a universal key doesn’t exist‚ patterns emerge across different series․
For instance‚ the “Huntington III ⎼ 2002” designation indicates the series name (Huntington)‚ a version number (III)‚ and the approximate year of manufacture (2002)․ Other numbers within the code may relate to blade span‚ motor size‚ or included features like light kits․
Unfortunately‚ Hampton Bay doesn’t publicly release a comprehensive decoding guide; However‚ online forums and communities dedicated to ceiling fans often share insights gleaned from collective experience․ Searching for specific model numbers online can reveal details shared by other owners․
Common Hampton Bay Fan Series
Hampton Bay offers a diverse range of ceiling fan series‚ catering to various styles and budgets․ The Huntington Series‚ particularly the Huntington III (often seen in homes built around 2002)‚ is a consistently popular choice‚ known for its reliable performance and classic design featuring a white and brass finish․
Beyond the Huntington‚ many homeowners favor 54-inch fans for larger rooms․ These provide substantial airflow and often include integrated light kits․ Other series‚ while less frequently discussed‚ offer unique aesthetics and functionalities․ Identifying the specific series is crucial for finding compatible replacement parts and accurate installation guides․
Availability of specific series can vary depending on the retailer and year․ Checking online resources and customer reviews can provide insights into the strengths and weaknesses of each series․
Huntington Series (e․g․‚ Huntington III ‒ 2002)
The Huntington Series‚ and specifically the Huntington III model from 2002‚ represents a cornerstone of Hampton Bay’s enduring popularity․ Frequently encountered in homes constructed during that era‚ this fan is lauded for its robust construction and effective airflow․ A common aesthetic features a white finish complemented by brass accents‚ offering a traditional look․
Owners often report a slight wobble‚ a typical characteristic that can usually be addressed with blade balancing – a procedure detailed later in this guide․ Despite its age‚ the Huntington III remains a powerful and reliable cooling solution․ Finding replacement parts can sometimes be challenging due to its age‚ but online resources and Hampton Bay’s customer service can assist․
Understanding the specific features of the Huntington III is key to proper maintenance and repair․
Other Popular Series (54-inch Fans)
Beyond the Huntington series‚ Hampton Bay offers a diverse range of 54-inch ceiling fans that have gained significant traction among homeowners․ These models often provide a balance between powerful airflow and aesthetic appeal‚ suitable for larger rooms․ Identifying the specific series is crucial for sourcing compatible replacement parts and accessing tailored troubleshooting advice․
While specific model names vary‚ common features include multiple speed settings‚ reversible motors for seasonal use‚ and integrated light kits․ Many 54-inch fans utilize similar wiring configurations‚ simplifying installation and repair for those familiar with basic electrical work․ However‚ always prioritize safety and consult a qualified electrician when in doubt․
Locating the model number is paramount for accessing detailed documentation and support resources specific to your fan․
Installation Instructions ⎼ General Overview
Proper installation is critical for the safe and efficient operation of your Hampton Bay ceiling fan․ Begin by carefully reviewing all included instructions and ensuring the ceiling junction box is rated to support the fan’s weight․ Safety first: disconnect power at the breaker before commencing any electrical work․
Typically‚ installation involves mounting the bracket to the junction box‚ wiring the fan motor to the power supply (following the appropriate wiring diagram)‚ and attaching the fan blades․ Pay close attention to wire connections – incorrect wiring can lead to malfunction or safety hazards․
Ensure all screws are tightened securely‚ and the fan is properly balanced to prevent wobble․ Finally‚ install the light kit (if applicable) and restore power to test the fan’s functionality․ If encountering difficulties‚ consult a qualified electrician․
Wiring Diagrams ‒ Common Configurations
Understanding wiring configurations is crucial for a successful Hampton Bay ceiling fan installation․ Common setups include a standard fan-only configuration‚ a fan with a light kit‚ and a fan with a remote control receiver․ Always disconnect power at the breaker before working with electrical wiring․
Typically‚ the black wire connects to the hot wire‚ the white wire to the neutral wire‚ and the green or bare copper wire to the ground wire․ For fans with lights‚ an additional wire will be present for the light kit․ Remote control receivers introduce additional wiring for signal transmission․
Refer to the specific wiring diagram included with your fan model‚ as configurations can vary․ Incorrect wiring can cause the fan to malfunction or create a safety hazard․ If unsure‚ consult a qualified electrician to ensure proper and safe connections․
Troubleshooting Common Issues
Addressing issues promptly ensures continued optimal performance of your Hampton Bay ceiling fan․ A frequent concern is fan wobble‚ often resolved by balancing the blades using the provided balancing kit․ Check blade screws for tightness and ensure all blades are securely attached․
Motor noise and vibration can indicate loose components or a failing motor․ Inspect the motor housing and mounting bracket for any looseness․ If the noise persists‚ the motor may require replacement․ Ensure the fan is properly mounted to the ceiling joist․
For electrical issues‚ always disconnect power before inspecting wiring․ If the fan doesn’t operate‚ check the remote control batteries or the breaker․ Consult a qualified electrician for complex electrical problems․
Addressing Fan Wobble
Fan wobble is a common issue‚ often easily resolved with a few simple steps․ Begin by ensuring all blade screws are securely tightened – loose screws are a primary cause․ Next‚ utilize the balancing kit typically included with your Hampton Bay fan․ This kit contains small weights that are strategically attached to the blades․
Follow the kit’s instructions carefully‚ testing the balance after each weight placement․ Start with a single weight and gradually add more until the wobble is minimized․ Check that blades are clean and free of debris‚ as uneven weight distribution can contribute to wobble․
If wobble persists‚ verify the mounting bracket is securely attached to the ceiling joist․ A loose bracket can exacerbate the problem․ Consider blade replacement if blades are warped or damaged․
Motor Noise and Vibration

Unusual motor noises and vibrations can indicate several potential issues․ First‚ confirm all screws connecting the motor housing and fan assembly are tightly secured; Loose components often rattle during operation․ Inspect the downrod for proper seating within the mounting bracket; ensure it’s firmly in place․
If the noise is a hum‚ a failing capacitor is a likely culprit – capacitor replacement may be necessary (see dedicated section)․ Vibration could stem from an unbalanced fan (refer to the ‘Addressing Fan Wobble’ section)․ Check for obstructions near the blades‚ as these can cause airflow disruption and noise․
Persistent‚ loud grinding noises suggest a more serious motor problem‚ potentially requiring professional repair or fan replacement․ Avoid continued use if significant noise or vibration is present‚ as it could indicate a safety hazard․
Remote Control Operation
Your Hampton Bay ceiling fan’s remote control offers convenient operation of fan speed‚ light dimming‚ and power functions․ Familiarize yourself with the button layout: typically‚ buttons control fan speed (High‚ Medium‚ Low‚ Off)‚ light on/off‚ and dimming levels․ Ensure the remote is pointed directly at the receiver unit located within the fan’s canopy․
Some remotes feature a “reverse” function to change the fan’s direction – useful for seasonal adjustments․ A “sleep breeze” mode may gradually decrease fan speed for comfortable sleep․ If the remote isn’t responding‚ check the batteries first; replace them with fresh ones․
Programming may be required after battery replacement or if the remote is malfunctioning (see ‘Remote Control Programming’ section)․ Obstructions between the remote and receiver can also hinder operation․
Remote Control Programming
Remote control programming is often necessary after battery changes or if the remote loses synchronization with the fan receiver․ The process typically involves a series of steps‚ often initiated by a specific button combination on the remote and receiver unit․ Consult your fan’s specific model instructions‚ as procedures vary․
A common method involves turning the fan’s power off‚ then back on․ Within a short timeframe (usually 30-60 seconds)‚ press and hold the “sync” or “learn” button on the receiver (accessible via the canopy) while simultaneously pressing a button on the remote․ A successful synchronization is usually indicated by the fan lights blinking or the fan briefly changing speed․
If the initial attempt fails‚ repeat the process‚ ensuring correct timing and proximity․ If problems persist‚ refer to Hampton Bay’s customer support for assistance‚ providing your fan’s model number for accurate guidance․
Blade Balancing Procedures
Addressing fan wobble is crucial for safe and comfortable operation․ Blade balancing kits‚ often included with the fan‚ contain small weights used to counteract imbalances․ Begin by identifying the blade causing the wobble – typically‚ the lowest point during rotation indicates the problematic blade․

Use the included clip to temporarily attach a weight to the trailing edge of the suspected blade‚ midway between the blade holder and tip․ Test the fan; if wobble improves‚ add more weight incrementally․ If wobble worsens‚ move the clip to a different blade․ Once the optimal weight and position are found‚ permanently attach the weight using the provided screws․
Repeat the process for each blade if necessary․ Proper balancing eliminates wobble‚ reduces noise‚ and extends the fan’s lifespan․ Always prioritize safety and consult the manual for specific instructions․
Replacing Fan Blades
Replacing fan blades might be necessary due to damage or a desired aesthetic change․ Before starting‚ ensure the fan is switched off at the breaker and allow the motor to cool completely․ Carefully remove the existing blades by loosening the screws connecting them to the blade holders (blade irons)․
Inspect the blade holders for any signs of wear or damage; replace them if needed․ Attach the new blades to the holders‚ ensuring they are securely fastened with the screws․ Verify that all blades are aligned and tightened to the same degree to prevent imbalance and wobble․
Reinstall the blade assemblies onto the motor housing‚ again ensuring secure attachment․ Test the fan at low speed to check for proper operation and balance․ If wobble occurs‚ refer to the blade balancing procedures section for correction․
Light Kit Installation and Repair
Installing or repairing a light kit requires careful attention to electrical safety․ Always disconnect power at the breaker before beginning any work․ Begin by removing the existing light kit‚ carefully disconnecting the wiring connectors – typically wire nuts connecting the hot‚ neutral‚ and ground wires․
Inspect the wiring for damage or fraying‚ replacing any compromised wires․ Attach the new light kit’s mounting bracket to the fan’s switch housing‚ ensuring it’s securely fastened․ Connect the wires according to the kit’s instructions‚ matching colors carefully․ Securely fasten the light kit to the bracket․
Install the light bulbs‚ ensuring they are the correct wattage for the fixture․ Restore power and test the light kit’s functionality․ If the light doesn’t work‚ double-check the wiring connections and bulb installation․
Replacing the Light Kit
Replacing a Hampton Bay light kit is a straightforward process‚ but safety is paramount․ First‚ disconnect the power supply at the circuit breaker to avoid electrical shock․ Carefully remove the existing glass shades and bulbs from the old light kit․ Disconnect the wiring connectors – usually wire nuts – linking the light kit to the fan’s wiring․
Detach the mounting bracket securing the old light kit to the fan’s switch housing․ Install the mounting bracket included with the new light kit‚ ensuring it’s firmly attached․ Connect the wires‚ matching colors (black to black‚ white to white‚ and ground to ground) using new wire nuts․
Securely attach the new light kit to the bracket․ Install the appropriate bulbs and glass shades․ Restore power at the breaker and test the new light kit’s operation․ Verify proper illumination and functionality․
Capacitor Replacement
Capacitor replacement is often necessary when a Hampton Bay ceiling fan motor hums but doesn’t spin‚ or operates at reduced speeds․ Begin by disconnecting power at the circuit breaker – this is crucial for safety․ Locate the capacitor‚ typically housed within the fan’s switch cup‚ under the decorative cover․ Carefully remove the switch cup to access the wiring․
Note the capacitor’s microfarad (µF) rating and voltage – it’s vital to use a direct replacement․ Disconnect the wires from the old capacitor‚ remembering their positions․ Install the new capacitor‚ connecting the wires exactly as they were before․
Secure the wiring and reassemble the switch cup․ Restore power and test the fan’s operation․ If the fan still doesn’t work‚ double-check the wiring and capacitor specifications․ Always discharge the capacitor before handling it to avoid electric shock․
Switch Replacement
Replacing a faulty switch in your Hampton Bay ceiling fan restores control over its speed and light functions․ First‚ and most importantly‚ disconnect power at the circuit breaker․ Remove the fan’s switch cup‚ carefully noting the wire connections to the existing switch․ Take a photo for reference – this is incredibly helpful during reassembly․
Disconnect the wires from the old switch․ Ensure the new switch is the correct type (rotary‚ pull-chain‚ or remote receiver compatible)․ Connect the wires to the new switch‚ matching the original configuration precisely․ Secure the wiring with wire connectors and carefully tuck it into the switch cup․
Reattach the switch cup and restore power․ Test the fan’s operation‚ verifying that all speeds and light functions work correctly․ If issues persist‚ double-check the wiring and switch compatibility․
Hampton Bay Warranty Information
Hampton Bay ceiling fans typically come with a limited lifetime warranty on the motor and a varying warranty period for other components‚ such as blades‚ light kits‚ and controls․ The warranty generally covers defects in materials and workmanship under normal use․ Proof of purchase‚ like your original receipt‚ is crucial for making a warranty claim․
Warranty coverage doesn’t extend to damage caused by improper installation‚ misuse‚ accidents‚ or modifications․ Regular maintenance‚ as outlined in this manual‚ is often required to maintain warranty validity․ To initiate a claim‚ contact Hampton Bay customer service with your model number and purchase details․
Specific warranty terms can vary depending on the fan model and purchase date․ Always refer to the warranty documentation included with your fan for the most accurate and up-to-date information․ Keep your warranty information in a safe place․
Where to Find Replacement Parts
Locating replacement parts for your Hampton Bay ceiling fan is often straightforward‚ with several convenient options available․ Major home improvement retailers‚ like The Home Depot (where Hampton Bay fans are exclusively sold)‚ typically stock common parts such as blades‚ light kits‚ and pull chains․
Online marketplaces‚ including the Home Depot website and other e-commerce platforms‚ offer a wider selection of parts‚ including capacitors‚ switches‚ and remote controls․ When ordering online‚ having your fan’s model number is essential to ensure compatibility․ Hampton Bay customer service can also assist in identifying the correct parts․
For discontinued parts or specific components‚ consider searching specialty ceiling fan parts retailers online․ Always verify the part number and specifications before purchasing to avoid returns and ensure a proper fit․ Keep your model number handy!
Online Resources and Support
Numerous online resources provide support for Hampton Bay ceiling fans‚ supplementing this manual․ The Home Depot website features a dedicated section for Hampton Bay products‚ including FAQs‚ installation guides‚ and troubleshooting tips․ Fixya‚ a popular online repair community‚ hosts a wealth of user-submitted solutions and discussions related to Hampton Bay fans․
Reddit’s r/HomeImprovement and r/HelpMeFind subreddits often contain threads where users share experiences and seek assistance with identifying models and resolving issues․ YouTube is a valuable source of instructional videos demonstrating installation‚ repair‚ and maintenance procedures․
Manufacturer’s support pages‚ accessible through The Home Depot website‚ offer downloadable manuals and access to customer service contact information․ Utilizing these online resources can significantly simplify troubleshooting and ensure successful fan operation․
Hampton Bay Customer Service Contact Information
For direct assistance with your Hampton Bay ceiling fan‚ contacting customer service is often the most efficient route․ Hampton Bay is primarily a brand sold exclusively through The Home Depot‚ so support is generally accessed through their channels․
The Home Depot’s customer service can be reached via phone at 1-800-HOME-DEPOT (1-800-466-3337)․ Online support is available through The Home Depot’s website‚ offering live chat and email contact options; When contacting support‚ having your fan’s model number and purchase date readily available will expedite the process․
Be prepared to describe the issue in detail‚ and if possible‚ provide photos or videos demonstrating the problem․ While Hampton Bay doesn’t have a dedicated phone line‚ The Home Depot’s representatives are equipped to handle Hampton Bay-specific inquiries․
Safety Precautions During Installation and Repair
Prioritize safety when installing or repairing your Hampton Bay ceiling fan․ Always disconnect the power supply at the circuit breaker or fuse box before beginning any electrical work․ Ensure the ceiling structure is capable of supporting the fan’s weight; improper mounting can lead to falls․
Use appropriate safety gear‚ including safety glasses and gloves․ Never work alone; having an assistant can be invaluable․ Carefully read and understand all instructions before starting․ Avoid working on a ladder if you are uncomfortable or unsteady․
If you are not comfortable with electrical wiring‚ consult a qualified electrician․ Double-check all connections to ensure they are secure․ Keep children and pets away from the work area․ Follow all local electrical codes and regulations․
Ceiling Fan Maintenance Schedule
Regular maintenance extends the life and efficiency of your Hampton Bay ceiling fan․ Monthly‚ inspect the blades for dust accumulation; clean them with a soft‚ damp cloth to maintain balance and airflow․ Periodically (every 3-6 months)‚ tighten all screws‚ including those securing the blades‚ brackets‚ and light kit‚ to prevent wobbling and noise․
Annually‚ check the motor for any unusual sounds or vibrations․ Inspect the wiring for damage or fraying‚ and address any issues promptly․ Lubricate the motor bearings if recommended in your specific model’s instructions․ Clean the light kit and glass shades to maximize brightness․
Consider professional inspection every few years‚ especially if you notice persistent problems․ Following this schedule ensures safe and reliable operation‚ preserving your fan’s performance for years to come․
Welcome to this comprehensive guide designed to assist you with all aspects of your Hampton Bay ceiling fan․ This manual covers everything from initial setup and operation to troubleshooting common issues and performing necessary repairs․ Understanding your fan’s model number is crucial‚ often found on a sticker atop the motor housing or identifiable via the UPC code with Hampton Bay’s support․
We’ll delve into decoding these numbers to pinpoint your specific series‚ like the popular Huntington models․ This resource details general installation procedures‚ common wiring configurations‚ and solutions for problems like wobble or motor noise․ Furthermore‚ we’ll explore remote control functionality‚ blade balancing‚ and light kit maintenance․
Safety is paramount; always adhere to the precautions outlined within․ This guide aims to empower you to maintain your Hampton Bay fan efficiently and safely․